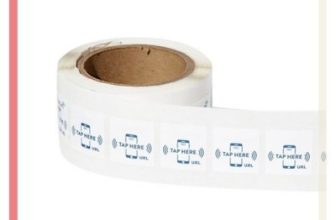
What are Programmable RFID Stickers?
Programmable RFID stickers are RFID tags that can be written and rewritten with new data using an RFID reader/writer. Unlike read-only RFID tags that come pre-encoded with a fixed ID or serial number, programmable RFID stickers allow you to customize the data stored on them according to your needs.
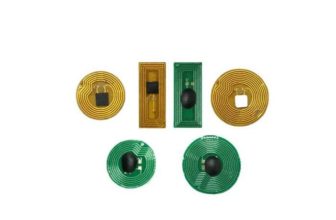
There are different types of programmable RFID stickers, depending on the frequency, memory size, protocol, and chip they use. Some of the most common ones are:
- NFC stickers: These are programmable RFID stickers that operate at 13.56 MHz and use the NFC (Near Field Communication) protocol. NFC stickers are compatible with NFC-enabled smartphones and devices, and can be used for various applications, such as contactless payments, smart posters, social media sharing, and more. NFC stickers typically use NTAG or MIFARE chips that have different memory sizes and features.
- UHF stickers: These are programmable RFID stickers that operate at 860-960 MHz and use the UHF (Ultra High Frequency) protocol. UHF stickers have a longer read range than NFC stickers (up to 10 meters), but require a dedicated UHF reader/writer. UHF stickers can be used for applications that require long-distance identification and tracking, such as logistics, warehouse management, retail, and more. UHF stickers typically use Alien or Impinj chips that have different memory sizes and features.
Programmable RFID stickers are small, adhesive tags that can store and transmit data using radio frequency identification (RFID) technology. Programmable RFID stickers can be used for various applications, such as inventory tracking, access control, product identification, and more. But how do you program RFID stickers to store the data you want? In this article, we will explain the basics of RFID programming and show you how to program RFID stickers using an Arduino and a reader.
But what makes RFID stickers programmable? And how can you program them for your own projects?
In this article, we will answer these questions and show you some examples of how to use programmable RFID stickers with Arduino and other devices.
What is RFID programming ?
RFID programming is the process of writing data to an RFID tag or RFID sticker using an RFID reader. An RFID reader is a device that can communicate with RFID tags using radio waves. An RFID tag or Programmable RFID sticker consists of a chip and an antenna that store and transmit data. There are two types of RFID tags: passive and active. Passive RFID tags do not have a battery and rely on the reader’s power to operate. Active tags have a battery and can transmit data over longer distances.
The data stored on an RFID tag or Programmable RFID stickers is usually a unique identifier (UID) that can be used to distinguish one tag from another. However, some tags also have user memory that can store additional information, such as product name, price, expiration date, etc. The amount of user memory varies depending on the type and model of the tag.
To program an RFID tag or sticker, you need to know which memory bank you want to write to, the numbering system you want to use, and the length of the data you want to store. The memory bank is the section of the tag’s memory where the data is stored. There are four main memory banks in an RFID tag: Reserved, EPC, TID, and User. The Reserved memory bank stores information such as passwords and access codes. The EPC memory bank stores the electronic product code (EPC), which is a standard format for identifying products using RFID. The TID memory bank stores the tag identifier (TID), which is a unique serial number assigned by the manufacturer. The User memory bank stores any custom data that the user wants to write.
The numbering system is the way the data is represented in the tag’s memory. There are two common numbering systems: hexadecimal (Hex) and ASCII. Hexadecimal is a base-16 system that uses numbers from 0 to 9 and letters from A to F. ASCII is a base-256 system that uses numbers from 0 to 255 to represent characters from the English alphabet and other symbols. For example, the letter A in Hex is 41 and in ASCII is 65.
The length of the data is the number of bits or bytes that the data occupies in the tag’s memory. A bit is a binary digit that can be either 0 or 1. A byte is a group of eight bits. For example, the letter A in Hex is one byte (41) and in ASCII is also one byte (65).
How to Program RFID Stickers Using Arduino
To program RFID stickers using Arduino, you will need three things: an Arduino board, an RFID sticker reader, and some passive UHF RFID stickers. UHF stands for ultra-high frequency and refers to the radio wave range that these stickers operate at. UHF stickers typically have a longer read range and a larger user memory than other types of stickers.
For this tutorial, we will use an Arduino Uno board, a PhidgetsRFID passive tag reader¹, and some UHF stickers¹. The PhidgetsRFID reader can read and write passive tags that operate at 125 kHz frequency. It connects to the Arduino board via USB and has four pins: GND, VCC, RST, and IRQ³. The GND pin needs to be connected to GND (0V) on the Arduino board. The VCC pin needs to be connected to VCC (3.3V) on the Arduino board. The RST pin is a pin for reset and power-down. When this pin goes low, hard power-down is enabled. On the rising edge, the module is reset. The IRQ pin is an interrupt pin that can alert the Arduino board when an RFID sticker comes into its vicinity.
To program an RFID sticker using Arduino, you will need to follow these steps:
- Download and install the Phidgets library for Arduino from https://www.phidgets.com/docs/Language_-_Arduino#Quick_Downloads
- Connect the PhidgetsRFID reader to your Arduino board using jumper wires as shown in Figure 1.
- Connect your Arduino board to your computer using a USB cable and open the Arduino IDE.
- In the Arduino IDE, go to File > Examples > Phidgets > RFID_simple and open the sketch.
- In the sketch, change the line #define RFID_SERIAL Serial to #define RFID_SERIAL Serial1. This tells the Arduino board to use Serial1 as the communication port for the RFID reader.
- Upload the sketch to your Arduino board and open the serial monitor.
- Place an RFID sticker near the reader and observe the output on the serial monitor. You should see something like this:
Tag read: 0100C0A80140
Protocol: EM4100
This means that the reader has read the UID of the sticker, which is 0100C0A80140 in Hex, and the protocol of the sticker, which is EM4100. EM4100 is a common format for 125 kHz RFID tags.
- To write data to the sticker, you need to modify the sketch. First, you need to uncomment the line #define WRITE_CODE. This enables the write mode of the sketch. Second, you need to change the line char tagData[5] = {0x01, 0x02, 0x03, 0x04, 0x05}; to the data you want to write to the sticker. For example, if you want to write “Hello” in ASCII, you need to change it to char tagData[5] = {0x48, 0x65, 0x6C, 0x6C, 0x6F};. Note that you can only write up to five bytes of data to the sticker.
- Upload the modified sketch to your Arduino board and open the serial monitor.
- Place an RFID sticker near the reader and observe the output on the serial monitor. You should see something like this:
Tag read: 0100C0A80140
Protocol: EM4100
Attempting to write tag...
Write successful!
This means that the reader has written the data “Hello” to the sticker.
How to Program RFID Stickers by NFC RFID reader?
To program RFID stickers, you need to have an RFID reader/writer that supports the frequency and protocol of the sticker you want to program. You also need to have a software or an app that allows you to write data to the sticker.
For example, if you want to program an NFC sticker, you can use an NFC-enabled smartphone or an Arduino board with an NFC shield or module. You can also use an app like NFC Tools or TagWriter to write data to the sticker using your smartphone.
If you want to program a UHF sticker, you need to have a UHF reader/writer that supports the protocol and chip of the sticker you want to program. You also need to have a software or an app that allows you to write data to the sticker.
For example, if you want to program a UHF sticker with an Alien chip, you can use an Alien reader/writer from DO RFID Reader manufacturer. You can also use a software like Alien Gateway Control Console or Tag Manager to write data to the sticker using your computer.
The process of programming an RFID sticker usually involves the following steps:
- Connect the RFID reader/writer to your device (smartphone, computer, Arduino, etc.)
- Launch the software or app that allows you to write data to the sticker
- Place the sticker near the antenna of the reader/writer
- Select the memory bank and the data format (hexadecimal or ASCII) that you want to write
- Enter the data that you want to write to the sticker
- Confirm and execute the write command
- Check if the data is written correctly by reading it back
How to Use Programmable RFID Stickers?
Programmable RFID stickers can be used for many purposes, depending on the type of data you write on them and the type of device you use to read them.
Here are some examples of how to use programmable RFID stickers with Arduino and other devices:
- Create a smart poster: You can write a URL or a text message on an NFC sticker and attach it to a poster or a flyer. When someone scans the sticker with their smartphone, they will be directed to your website or see your message on their screen.
- Make a contactless payment: You can write your credit card information on an NFC sticker and attach it to your wallet or phone case. When you want to pay at a store that accepts NFC payments, you just need to tap your sticker on the terminal and confirm the transaction.
- Track your assets: You can write a unique ID or a serial number on a UHF sticker and attach it to your assets, such as tools, equipment, or vehicles. When you want to locate or inventory your assets, you just need to scan them with a UHF reader and see their information on your software.
- Control your devices: You can write a command or an instruction on an NFC sticker and attach it to a device, such as a la
- mp, a fan, or a speaker. When you want to control the device, you just need to scan the sticker with an Arduino board that has an NFC shield or module and a relay or a transistor connected to the device. The Arduino will read the command from the sticker and execute it accordingly.
- These are just some of the many ways you can use programmable RFID stickers for your projects. You can also experiment with different types of data, devices, and applications to create your own smart solutions.
Where to Buy Programmable RFID Stickers?
If you are interested in buying programmable RFID stickers, you can find them online at various websites, such as:
- Amazon: Amazon offers a wide range of programmable RFID stickers, both NFC and UHF, from different brands and manufacturers. You can also find RFID reader/writers and Arduino boards and modules that support RFID programming.
- atlasRFIDstore: atlasRFIDstore is a specialized online store that sells RFID products, including programmable RFID stickers, reader/writers, antennas, software, and more. You can also find helpful resources and tutorials on how to use RFID products for your projects.
- RFID Tag MAKER: RFID Tag Maker sells various RFID products from China, including programmable RFID stickers, RFID reader/writers,RFID Card, NFC tag. You can find cheap and affordable RFID products on www.rfidtagmaker.com.
Conclusion
Programmable RFID stickers are small, thin, and flexible tags that can store and transmit data using radio frequency identification (RFID) technology. They can be attached to various objects and surfaces, such as products, packages, posters, cards, and more. Programmable RFID stickers allow you to customize the data stored on them according to your needs.
To program RFID stickers, you need to have an RFID reader/writer that supports the frequency and protocol of the sticker you want to program. You also need to have a software or an app that allows you to write data to the sticker.
Programmable RFID stickers can be used for many purposes, such as inventory management, asset tracking, access control, marketing, and authentication. You can also use them with Arduino and other devices to create smart solutions for your projects.
If you are interested in buying programmable RFID stickers, you can find them online at various websites, such as Amazon, atlasRFIDstore, or RFID Tag Maker.
We hope this article has helped you understand what programmable RFID stickers are and how to use them. If you have any questions or comments, please feel free to leave them below. Thank you for reading!